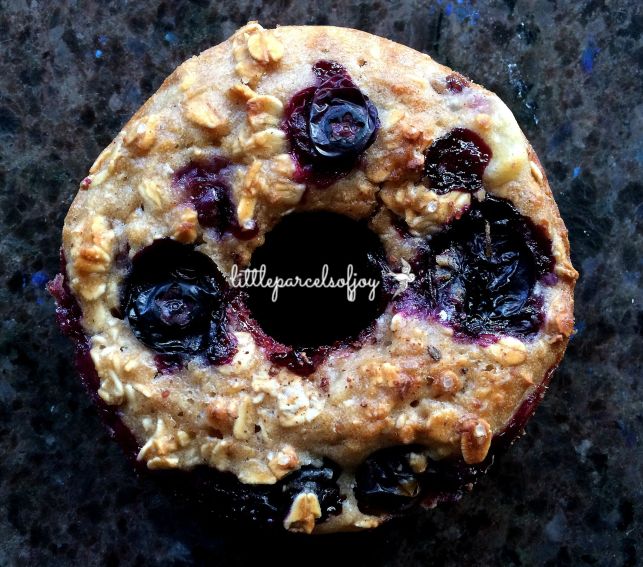
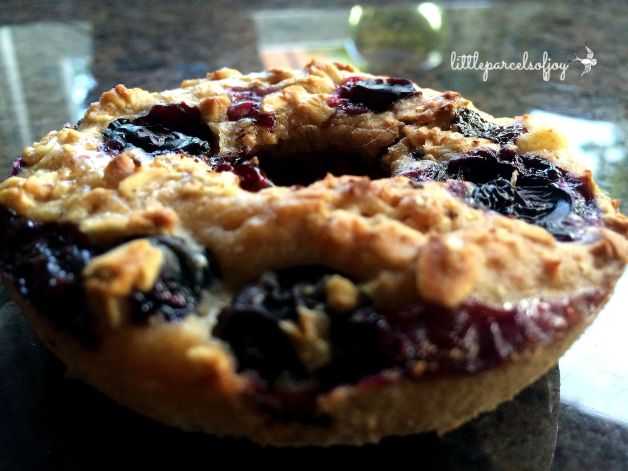
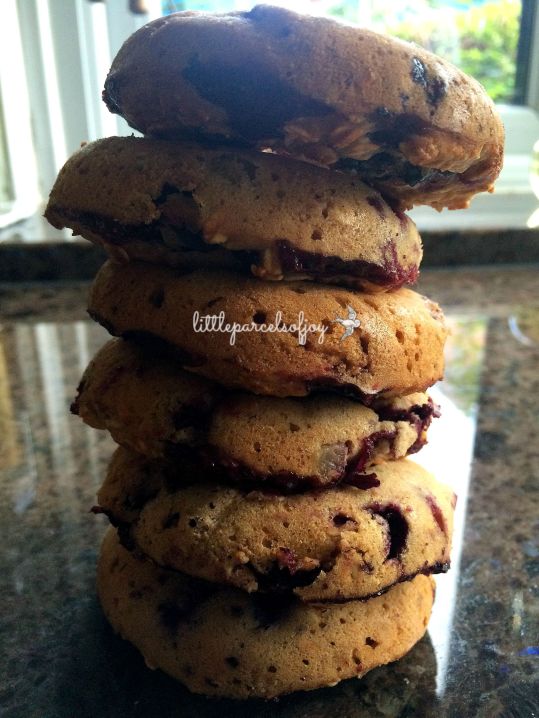
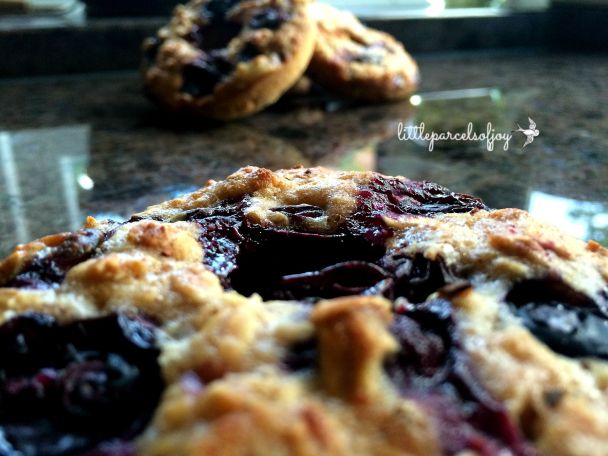
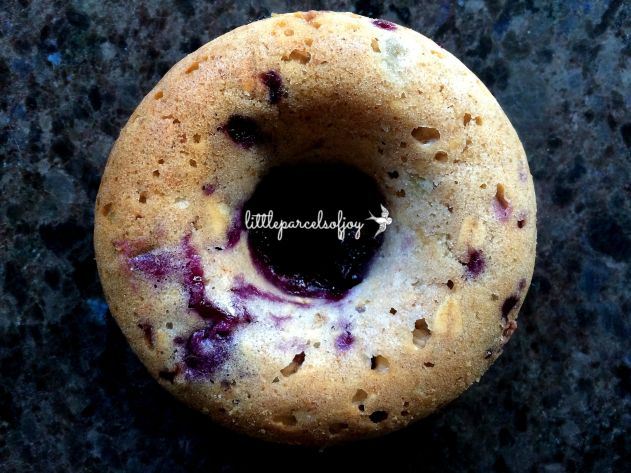
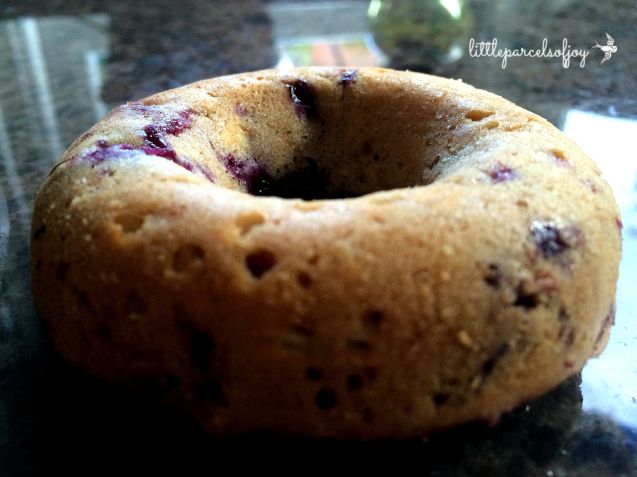
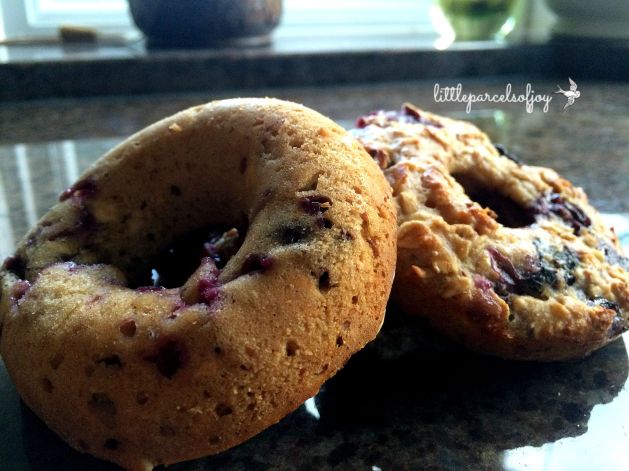
Blueberry & Oat Doughnuts

Owning a doughnut pan is a very very risky business. I feel as though it is possible I may have gained at the very least half a stone in weight – simply from doughnuts.

IMG_0094

IMG_0095

IMG_0100

IMG_0102

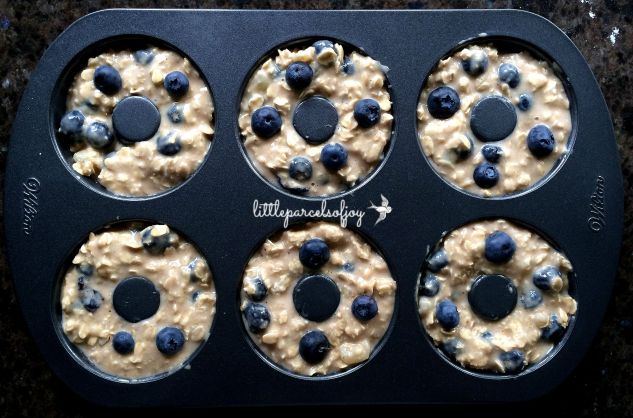
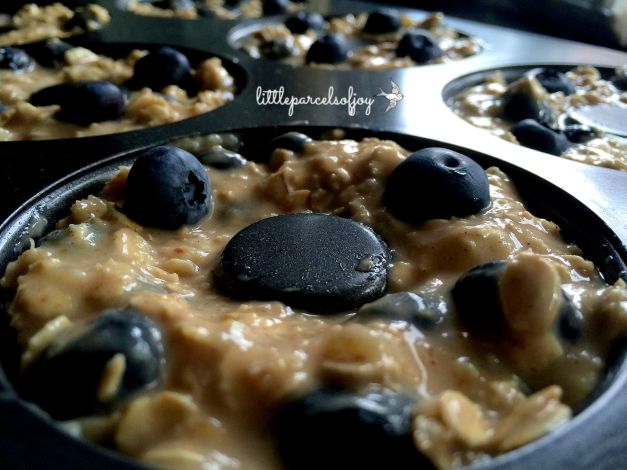
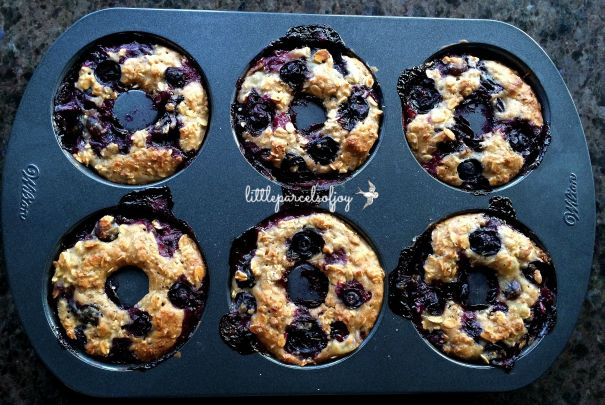
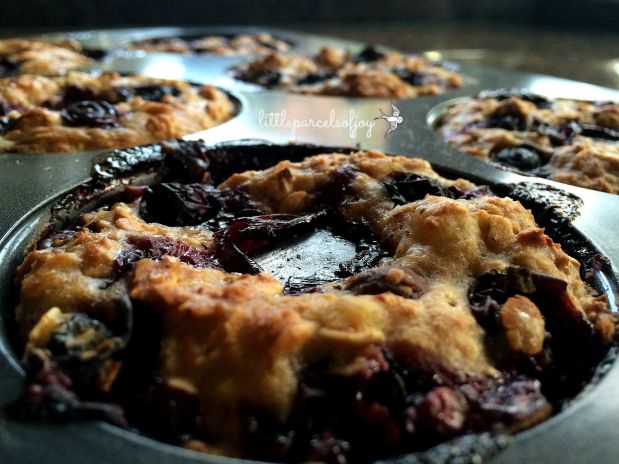
So to make myself feel very slightly better, I made up a rather healthy and rather tasty recipe! I’ve had some applesauce in my fridge for a while and have been meaning to put it to good use. If you don’t have any in the cupboard, yogurt could be another good healthy substitution for the ‘fat’. I love the addition of blueberries, spilling and bubbling over the top, creating a sweet and subtle flavour. The applesauce is quite tangy, and it’s not everyone’s cup-o’-tea, but I kinda like it!

IMG_0103

IMG_0105

IMG_0111

IMG_0119

Considering these are so so low in calorie and still considerably satisfying when you simply need “a bit of scran” (don’t you just love British slang), they definitely stand alongside my insanely healthy flapjacks!

The fact that you still feel as though you are holding a doughnut (oh that wondrous and godly shaped treat) basically makes you love them either way. Who doesn’t love a doughnut?!

IMG_0106

IMG_0107

IMG_0115

Enjoy! ❤

Blueberry & Oat Doughnuts (makes 6)

50g rolled oats

30g plain flour

1 tbsp soft brown sugar

½ tsp cinnamon

1 tsp baking powder

2 tbsp applesauce

60ml soya milk

1 tsp vanilla extract

Handful fresh blueberries

  1. Preheat the oven to 190 degrees and spray your doughnut pan with non-stick spray
  2. Mix your dry ingredients together and then pour in the wet. Gently fold in the blueberries until fully combined
  3. Pipe or spoon into your tin (whichever you find easiest) and bake for around 15 minutes
  4. Remove from the oven and cool on a wire rack

Summer, Life, Honey & Jam

This post has been a long time coming, and I felt that it was necessary to FINALLY post it, as summer seems to finally be leaving us (here in England anyway!). So here are some of my special moments…..
IMG_9537
IMG_9530
IMG_9535
This summer has been one of my favourites. It’s been the hardest certainly, searching for jobs, working to earn little money with part time work to cover the summer and so on. But it has been a simple summer. I haven’t been able to afford much, but I feel as though I’ve done more than I’ve ever done before.
I’ve spent quality time with family and friends. I’ve walked Wilfy three times a day, breathing in the fresh country air and enjoying the wildlife around me. This summer I started to take in my surroundings, I mean properly stop, look, listen, smell (maybe not taste everything!) but truly take in what is around me. The plants, trees, flowers, animals and patterns of the weather. I haven’t turned ferrel or anything, as much as my boyfriend Gavin wants to camp out in our field and document everything that passes us by, but I’ve enjoyed the peace and simplicity of life in the countryside.
I’m lucky enough to live in a quiet village (on the border of Wales/England), where everything is green and kind of smells like manure all the time! I’ve enjoyed endless bike rides, picking homegrown fruit and veg, extracting honey from our bees and more.
Harvesting the honey was probably one of my favourite moments…. Here are a few pictures documenting the process and adventure (to anyone who keeps bees or knows anything about them, I won’t pretend to explain half of what goes into this – but here’s the dummie link with a basic overview, if anyone is interested!)
11225401_10206146653498633_5032291177153019571_n
My dad, not looking too pleased getting his photograph taken, and of course Wilfy trying to get in on the action!
11223604_10206146579976795_2862944454763753725_n
11745591_10206146648618511_8559506835963627835_n
Dad didn’t have much time on his hands this year, hence the dishevelled look of the frame – however the honey never tasted better!
 11753658_10206146579136774_5127489261059515061_n
11753652_10206146653378630_5034630684713218833_n
It’s tricky work taking pictures with sticky fingers!
11223701_10206146579416781_5285974282758231076_n
11701166_10206146600657312_4266193724857254247_n
We got 12 jars altogether 🙂
11760151_10206146648338504_8383856816904529076_n
10426589_10206146588297003_1406248840912719966_n
For my lovely nephew George…
11229300_10206146581976845_1141031283420893739_n
10418346_10206146600057297_8637750394555487101_n
  11667306_10206146594297153_5240867676633103181_n
We love the dark colouring and our thoughts are that it could be from the local hawthorn or clover that the bees absolutely love in our field, thus producing a rich colouring.   
11144960_10206146586776965_6262304819535673258_n
Making jam from our homegrown fruit was also a great moment. I’d never made jam before and don’t think I will ever stop making it now – it’s sooooooooooo easy! We had some lovely blackcurrants to use, creating a delicious dark and rich flavoured jam.
11737959_10206146577176725_7534798474416561117_n
11892046_10206362333250492_611731361577874879_n
11892046_10206362333850507_2439233052589907743_n
11907762_10206362333130489_7611321698486045446_n
This slowly turned into Blackcurrant, Strawberry & Raspberry jam, Plum jam and then Greengage jam! Each a little more runny or solid than the last, each with slightly more bits than the last, different shades of pinky purply reds, but ALL tasting simply AMAZING. *I will post the recipes for these in the next two weeks so watch out!*
IMG_0208
IMG_0206
11218814_10206362334930534_6301955589040408395_n
11891062_10206362334170515_2946046633912084897_n
11900019_10206362335610551_6571219428172821543_n
11035691_10206362335330544_1107511954659668078_n
11866479_10206362331930459_2527726282424461606_n
11953226_10206362336130564_7399199154886859294_n
We even enjoyed some tasty peas somewhere along the way (around mid July, early August). These were lovely with some white fish and a creamy white sauce.
11755878_10206146578696763_1473504799634980983_n
11223701_10206146577296728_2123258315350718125_n
So, saying goodbye to summer, I am now enjoying a lovely two week stay in Madeira. However a little part of me is looking forward to the autumn. Getting my woolly tights and boots out, and embarking on a long list of warming food; hearty broths, sweet pies, stews and scrummy treats (as always!).
Enjoy ❤

Queen Victoria Cake

So it was my birthday yesterday…. And this song is more than a little appropriate….

I’m definitely feeling 22!

Anyway, birthdays only mean one thing, baking and eating lots and lots and lots and lots of cakes. I’m currently carrying around about 6lb of birthday weight. But that’s okay, because I have thoroughly enjoyed myself. Gavin bought me a big Mason Cash bowl and a spiralizer, Mom and Dad bought me box sets of Hawaii 5.0 and NCIS, my brothers bought me vouchers, recipe books and a doughnut pan (how cool?!), and my aunties all pitched in to buy me a waffle maker.

I CAN’T WAIT TO TEST OUT ALL MY GOODIES!

Before all the craziness started and the huge family BBQ began, Gavin and I sat for hours making a million and one cake pops. I didn’t even think to take pictures, I think my hands would have been too sticky anyway, but they went down an absolute treat!! I’d say around a third of the birthday weight is from carrot cake pops and chocolate fudge cake pops…. Oops!

20498_10206186082524334_4813338574312444476_n

I also baked probably one of the best yet most simple recipes I’ve come across. Whenever I bake a Victoria Sponge I sometimes find it can be a little egg-y or too vanilla-y. This recipe calls for a little zest of orange and it just creates such a deliciously light flavour – you can’t really go wrong.


After this recipe I will be posting an interesting piece about extracting and harvesting honey as well as making Blackcurrant, Strawberry & Raspberry Jam. Our field is really thriving at the moment and we’ve had such a blast harvesting the honey from our bees, as well as picking fruit for jam!

So this queen of sponges uses homemade jam, as well as freshly picked raspberries left over from when George visited (also used in my Raspberry, Almond & White Chocolate Blondies)


Spot the conveniently placed homemade jam in the background 😉

Enjoy!

*recipe inspired by Jamie Oliver*

Queen Victoria Sponge (serves 8)

250g softened unsalted butter

250g self-raising flour

250g caster sugar

4 eggs

zest of 1 orange

Handful of fresh raspberries

icing sugar, for dusting

For the Jam:

a few drops of rosewater, to taste

4 tbsp raspberry jam (or homemade blackcurrant, raspberry & strawberry jam!)

For the crystallized rose petals:

1 egg white

Handful of rose petals

Sprinkle of caster sugar

For the vanilla cream:

150ml double cream

½ a vanilla pod, split lengthways and seeds scraped out

2 tsp caster sugar

  1. Preheat oven to 190 degrees and grease/line your cake tins
  2. Cream the butter and sugar together until very light and fluffy. Add the eggs one at a time, ensuring you beat well after each addition. Now fold in the orange zest and flour
  3. Divide the mixture between your prepared tins and smooth with a spatula. Bake for around 20 minutes or until a skewer comes out clean. Allow to cool a little then transfer to a wire rack to completely cool (if the cake is still warm when you assemble the jam and cream with fly off!)
  4. Mix a few drops of rosewater into your jam, but make sure you don’t overpower it, it’s simply to get that light flowery taste!
  5. For the crystallized petals: Turn the oven right down to 110°C and whisk the egg white to stiff peaks. Using a pastry brush, coat the petals on both sides and then sprinkle over your caster sugar. Shake any excess sugar off and place on a lined baking tray. Cook for around 4 minutes, until they are nice and crispy!
  6. Whip your cream with the vanilla seeds and sugar until you get soft peaks
  7. To assemble the cake: Spread the jam and then the vanilla cream over one of the cakes, throwing in some raspberries before you place the second cake on top
  8. Dust with icing sugar and decorate with your crystallized rose petals

Raspberry, Almond & White Chocolate Blondies

I probably just had my favourite weekend. My favourite person in the whole entire world came to stay, (sorry Gavin 😉 ) my nephew George. Yes, he was George a few months before Prince George was George!

George is the chattiest, cutest, loveliest, most adorable, well-mannered, hilarious little two year old in the whole wide world. I never thought I could love a little person as much as I love him.

George also came bearing gifts; freshly picked raspberries from Linby (Nottinghamshire). As we are slowly nearing the end of the strawberry and raspberry season here in England, they were ripe and ready to munch on.

11811374_10206186075924169_1943278734327323548_n

11822624_10206186097644712_3516685676931051043_n

11822624_10206186075404156_3817481424936696990_n

Over the past few weeks I’ve made some crackin’ fruit related baking goodies: Strawberry n’ Cream Muffins, Strawberry & White Chocolate Shortbread, Extra Thick Strawberry Buttermilk Pancakes and Jumbo Raspberry Chocolate Muffins.

11822435_10206186074564135_6046880267686721032_n

11781724_10206186075124149_5802478216535881592_n

11222194_10206186074404131_9044316874604944775_n

So I’m thinking, hmmmm, what have I not made in a while….. BROWNIES! Or rather, BLONDIES! I’m a little obsessed with white chocolate at the moment, so these really have tipped me off the edge.

I’ve been in a blondie coma for approximately 3 days now.

11751961_10206186072564085_7892517840716839195_n

11222194_10206186072804091_2233446461110898387_n

Simple to make, with a wonderful cake-y flavour yet moist brownie texture, these are heavenly. The almonds create a lovely crunch and subtle nutty flavour, you can’t really say no.

Enjoy!

11800100_10206186073924119_4258372151595692232_n

Raspberry, Almond & White Chocolate Blondies (makes around 20)

200g self-raising flour

Pinch of salt

200g caster sugar

200g unsalted butter, softened

3 eggs

30g flaked almonds (I crushed them a little)

150g white chocolate chunks

150g raspberries

1 tsp vanilla extract

  1. Preheat the oven to 160 degrees and grease your baking tin
  2. Sift the flour and salt into a small bowl and set aside
  3. Cream the butter and sugar together until light and fluffy
  4. Gradually add one egg at a time along with a spoonful of flour
  5. Add the remaining flour and vanilla extract, until fully combined
  6. Gently fold in the almonds, white chocolate and raspberries – don’t be afraid of the mixture going pink and streaky from the raspberries – this adds to the appearance!
  7. Spoon into your tray and bake in the oven for around minutes
  8. Cool on a wire rack and then remove from tin – ENJOY!

11796372_10206186073164100_7445088145854528216_n

11796195_10206186074004121_2738486838095313893_n

Extra Thick Strawberry Buttermilk Pancakes

11221892_10206119876189217_1505911673199687759_n

As I look in my fridge this morning, all I can see is the buttermilk I bought, sitting, waiting patiently to be used. Bought specifically for scones (recipe will be up soon – I do love a good plain buttermilk scone), I now have some left over. Hmmmm what can I use with buttermilk. Obvious suggestions would be bread or cakes, but at the moment I’m enjoying baking with natural greek yogurt, and I don’t fancy anything too big or fancy……

Pancakes anyone?

I think if I could pick one thing to eat for the rest of my life…. It might just be pancakes. Weirdly enough they’ve never made it to my blog; they are just a standard part of my week and I never really use a specific recipe anyway – I always improvise when it comes to measuring. In fact it’s probably one of the only things I make where I leave it down to guess work. I know stateside you guys like to have ‘em small and thick, us Brits tend to have ‘em big and thin.

11755162_10206119883389397_5022355236802214862_n

11201830_10206119882509375_946490205017601438_n

There is genuinely nothing better than a pancake for breakfast, or lunch, or dinner, or snack… served with fruit, or chocolate, or syrup, or lemon, or sugar, or Nutella….. I could go on.

As much as I love love love pancakes, I’ve never really branched out and tried different types of recipes, I always go by the standard of flour, eggs and milk.

No matter what happens, I always have those three things in my fridge. I also know they are no hassle at all for me and my boyfriend – gluten-free flour and lactose free milk and we’re sorted.

But the buttermilk was staring me down, and I thought, well I really should try something different. These cake-y, extra thick, strawberry pancakes are just heavenly. Simple to make, and even simpler to munch on. They are very similar to Scotch pancakes (has anyone stateside tried these?!), which takes me straight back to childhood.

11011475_10206119880469324_4865444014724689809_n
11738070_10206119877469249_1138214014146982501_n

11221819_10206119877669254_8522602813027408696_n

As always you can swap strawberries with pretty much any fruit you prefer, and go wild, adding chocolate chips, sprinkles etc etc. And if you don’t happen to have buttermilk in your fridge staring you down – an easy substitute would be to mix 250ml milk with 1 tbsp lemon juice. Yes, it really is as easy as that!

Perfect for lazy Sunday mornings ❤

For more recipes to fit the strawberry season that has finally hit England, check out my new section under Country Girl Heart called Seasonal Favourites – we’ve got Strawberry & White Chocolate Shortbread, Strawberry n’ Cream Muffins and Strawberry Swirl Cupcakes.  

11751769_10206119881789357_7115189826891973578_n

11745610_10206119874749181_3305797422119847532_n

Strawberry Buttermilk Pancakes (makes around 6)

140g plain flour

35g granulated sugar

1/4 tsp bicarbonate of soda

1/2 tsp baking powder

220ml buttermilk, (splash more, if necessary)

1 egg

45g melted butter

1 tsp vanilla extract

Handful roughly chopped strawberries

  1. In a large bowl, stir the flour, sugar, baking powder and bicarbonate of soda together
  2. In a measuring jug add the buttermilk, egg, oil/melted butter and vanilla extract and whisk to combine
  3. Pour the wet ingredients over the dry and whisk until just combined (if it’s too thick splash a little more buttermilk in)
  4. Spray your pan with cooking oil and set over a medium-high heat
  5. Scoop your batter into the pan (for this recipe I like to have smaller and thicker pancakes, but size is completely optional)
  6. Sprinkle a few strawberries onto each pancake and cook for around 2 minutes – I usually double check if the side is golden brown before attempting to flip
  7. Flip carefully and cook second side until golden brown, around 2 ½ minutes
  8. Serve with butter, jam, maple syrup, butterscotch golden syrup (mmmmm my favourite at the moment) and so on
  9. If you don’t manage to munch all these up, they keep in the fridge for around 2 days (with a quick zap in the toaster to warm up)

It’s Strawberry Season!

Strawberry n’ Cream Muffins

I love it when you see crates full of strawberries lining the supermarkets…. it must really be summer. FINALLY!

Last year I made one of my favourite recipes – Strawberry Swirl Cupcakes – and they were delicious; super sweet and super pretty.

I don’t tend to bake with strawberries so much as I think they can be a little too sweet sometimes and don’t always hold together. I use them more for decoration i.e. plonk a strawberry on top of a cheesecake or souffle and it completely transforms the dessert into a beautiful masterpiece. Raspberries and blueberries however have that zing that works well in a lot of muffins, for example my Giant Raspberry & Chocolate Muffins and Gluten Free Chocolate & Blueberry Muffins. (note the chocolate in both these recipes, I think I have a problem?)

However I feel I have been blind to the potential of strawberries and will be baking with them more often…. I’m thinking strawberry and dark chocolate shortbread cookies next?!

Anyway, my Mom needed to take some baked goods to her church and I was nominated to bake some yummy treats. I ended up baking Strawberry n’ Cream Muffins. I had a pack of cream cheese in the fridge almost out of date…. and boy was I glad I used this as a filling. SO moist (especially from the yogurt) and SO tasty (from the fresh strawberries).

Mom came back empty handed……

Strawberry n’ Cream Muffins (makes around 12) 

For the streusel:

60g light brown sugar

60g plain flour

1 tsp cinnamon

50g unsalted butter, cold

For the muffins:

115g unsalted butter, softened

100g granulated sugar

50g light brown sugar

2 eggs

120g natural greek yogurt

1 1/2 tsp vanilla extract

220g plain flour

1 tsp baking powder

1 tsp bicarbonate of soda

Pinch of salt

Around 150-200g of fresh strawberries (I don’t tend to use frozen as the colour runs)

For the cream filling:

150g cream cheese

1 egg yolk

1 tsp vanilla extract

40g granulated sugar

  1. Preheat oven to 220 degrees. Spray your muffin trays with nonstick spray
  2. Make the streusel: In a small bowl, toss together the brown sugar, flour, and cinnamon. Cut in the butter in very small pieces and mix with a fork until the mixture resembles coarse crumbs
  3. Make the muffins: In a medium bowl beat the softened butter until smooth and creamy. Now add the sugars and beat until creamed. Add the eggs, yogurt, and vanilla extract. Beat until the mixture is completely combined.
  4. In a large bowl, toss together the flour, bicarbonate of soda, baking powder, and salt. Pour the wet ingredients into the dry and slowly mix with a whisk until combined (don’t worry I had a few lumps in my mixture). Finally, fold in the strawberries.
  5. Make the cream filling: In a medium bowl, beat the cream cheese until creamy. Add the egg yolk, vanilla extract, and sugar. Beat until combined
  6. Spoon 1 tablespoon of muffin batter into the muffin cups. Layer with around 1 tablespoon of cream filling, followed by another tablespoon of muffin batter. Sprinkle each muffin with streusel topping and gently press the streusel down into the muffin so it sticks
  7. Bake the muffins for 5 minutes at 220 degrees and then lower the temperature down to 180 degrees and bake for a further 15 minutes
  8. Allow to cool completely and transfer to wire rack. Be careful as the cream filling makes these muffins very very moist!
  9. I keep my muffins in the fridge for around 5-10 days, giving them a quick 10 second blast in the microwave. So yummy!

IMG_9383

IMG_9384

IMG_9386

IMG_9387

IMG_9389

IMG_9390

IMG_9391

IMG_9394 - Copy

IMG_9396

IMG_9398 - Copy

IMG_9402 - Copy

IMG_9406


Zingy Poppy Seed Muffins

After an insanely busy week I am beyond happy it’s the weekend! I’ve missed baking more than I thought I would this week – there are so many eggs in my fridge – usually I’m on a constant mission of hunting eggs down.

The weather here in England has been stunning – hitting the 30 degree mark was pretty good for us – Wilfy looooooves to find a sun pocket to bask in. His coat has transformed into a lovely dark caramel (the hassle of putting doggy sunscreen on his ears is not so enjoyable!). My hair has gone all blonde and my bones finally feel a little warmer after a chilly few months.

Wimbledon is on (summer must be here!) and I’m feeling happy. After a lot of job stress I’m finally back on track with what I really want to be doing with my time…… especially finding time again to bake some yummy treats.

Today it was to be Lemon & Orange Poppy Seed Muffins. It was my first time including poppy seeds in a recipe (hard to believe I know) and I don’t think I will be looking back anytime soon. I absolutely LOVE the crunch they provide to these soft and zingy muffins – as well as the adorable appearance. Don’t even get me started on the flavours – the combination of orange and lemon is so so so so so so so good.

If muffins could ever be pretty – I think these hit the spot.

Have a great weekend everyone! ❤

Lemon & Orange Poppy Seed Muffins (makes around 15)

280g plain flour

90g granulated sugar

60g light brown sugar

3 tablespoons poppy seeds

1 1/2 tsp baking powder

1/2 bicarbonate of soda

Pinch of salt

100g unsalted butter, melted

juice and zest of 1 lemon

juice and zest of 1 large orange

2 eggs

130g low fat natural (greek) yogurt

1 tsp vanilla extract

(or you can use vanilla yogurt and omit the extract)

  1. Preheat oven to 220 degrees. Grease your muffin tin
  2. In a large bowl, whisk the flour, sugars, poppy seeds, baking powder, bicarbonate of soda, and salt together until thoroughly mixed
  3. In a medium bowl, whisk the melted butter with the juices and zests. Add the eggs, one at a time, whisking after each addition. Mix in the yogurt and vanilla.
  4. Pour the wet ingredients into the dry and gently mix until no pockets of flour remain. Be careful not to overmix as this batter is sooooooo thick!
  5. Spoon the mixture into the muffin tins, filling them all the way to the top
  6. Bake for 5 minutes at 220 degrees and then reduce the heat to around 180 degres. Bake for a further 8-10 minutes. This is the help them rise quickly at the beginning and then bake thoroughly once the heat has been reduced
  7. Allow to cool on a rack for 10 minutes
  8. These keep fresh in the fridge for around 7 days (with a 10 second blast in the microwave these are simply delicious)


Playing around with Courgette… or Zucchini

I am simply in love with courgettes. They are by far my favourite vegetable…. I could eat them all day every day. Can you eat them raw? I’m going to go try….

SO TASTY!

A healthy substitute for pasta (no bloating yay!), Mediterranean roasted veg, fresh summer salad; I throw them in everything these days, even cupcakes. So today is centred around courgette cupcakes. I did a little research, mainly on other blogs and pinterest, as I didn’t trust any old recipe. I love looking at other bloggers’ pictures and reading their own suggestions. I love picking out particular flavours and creating different depths and textures.

Lime, lemon, cheese and other ingredients such as carrot, apple and nuts, all stood out to me.

I had to be careful what I added (baking for my boyfriend is always a little special – working my way around the Fodmap diet!) so although I made mine relatively plain, you can tweek your flavours to taste.

Expect more of these soon 🙂

Courgette Cupcakes (makes around 18)

200g light muscovado sugar

180ml rapeseed oil (or any other flavourless oil)

2 large eggs

1/2 tsp vanilla extract

200g plain flour

1/2 tsp baking powder

1/2 tsp bicarbonate of soda

1 tsp ground cinnamon

250g grated courgette

Optional:

Zest of lime
1/2 tsp ground ginger
1/2 tsp ground nutmeg
60g chopped walnuts, almonds, sultanas

For the frosting:

300g half-fat cream cheese

50g icing sugar

The juice of 2 limes

(I used my vanilla frosting from my Cappuccino Cake recipe – I couldn’t m=find any dairy free cream cheese in time!)

  1. Preheat the oven to 170 degrees and line your muffin tin with cases
  2. Mix together the sugar and eggs, following with the oil and vanilla essence, until combined
  3. Sift in the flour, baking powder, bicarbonate of soda and any spices you desire. Mix until just combined (you don’t want to overwork as you will end up with really dense muffins)
  4. Stir in your grated courgettes and any nuts/fruit desired
  5. Divide mixture between cases and bake for around 20 minutes, until the tops spring back
  6. For the frosting, mix all of the ingredients together until light and fluffy (adding as much lime juice needed to wet the mixture) and spread or pipe (if you’re fancy!) onto your cakes
  7. Sit back and enjoy – and don’t feel too guilty – these aren’t too unhealthy!


Insanely Healthy Protein Flapjacks (gluten, dairy, sugar & (almost) fat FREE)

This is quite a momentous post for me….

I’m going to be honest and say that I have never been the biggest fan of flapjacks. I found that they took forever to chew, were usually dry and never actually included any ingredients that I actually liked. Haters gonna hate!

However my boyfriend made a tray around a year ago, packed it full of banana, golden syrup and chocolate, and I was absolutely blown away. I loved them so much and found that I could munch on one and feel completely satisfied afterwards. They were super moist (because of the banana) and super sweet (because of the syrup) and of course packed with my favourite thing on this planet – chocolate!

So I’ve been making these quite regularly – and they really satisfy my sweet tooth – click here for my sugar and fat filled goodies!

Now look away if you don’t want to see the healthier versions….

I decided last week that with all this baking, I needed to reel myself in a little, and remember that life shouldn’t actually revolve around chocolate (it kinda does though doesn’t it?!). I wanted to make something that I could feel less guilty afterwards – but still tasty enough to want to eat.

After I was ill last year, my taste buds completely changed and I totally love oats and fruit these days. So I had a bit of a *light bulb* moment and realised that I would actually probably enjoy flapjacks that included things like raisins and apricots, when a few years ago I would have wrinkled my nose and professed my hatred.

Of course I couldn’t not include bananas (my favourite fruit to bake with), so after experimenting with a few recipes, I decided on this one.

It’s gluten-free, dairy-free, sugar-free, more-or-less fat free, and packed with fruit, seeds and oats – they are basically bursting with protein so ideal for a pre or post workout snack.

*flax seeds* seem to be the buzz ingredient these days and every time I’ve seen anyone talk about it, I’ve rolled my eyes and ignored the boring ‘health freaks’. However after conducting a little research I realised that brown linseed or commonly known as flax seeds are great for IBS or IBD sufferers. Ding ding ding – Gavin, Mom and myself are all sufferers – so off I hopped to the supermarket to buy some (I bought the supermarket range rather than any brand stuff – it’s deathly expensive!) and hope to see possible benefits soon 🙂

Sooooooooo – if you need a good fix of protein and energy, these flapjacks really do hit the spot. Using mashed banana and grated apple glues the mixture together (therefore reducing the amount of fat needed) and the honey adds a subtle sweet taste (don’t even get me started on honey – I think it’s one of the most underrated things out there – as long as you get 100% natural stuff, a spoonful of honey a day definitely keeps the doctor away).

Of course, after all this, I still had to grate a teeny weeny bit of dark chocolate over the top (oops!) I just couldn’t resist. But hey, dark chocolate isn’t that bad for you is it?!

ENJOY! ❤

Protein Flapjacks (makes around 12 slices)

40g butter (I use soya)

2 tbsp honey

2 ripe bananas, mashed

1 apple, peeled and grated

40g apricots, chopped

40g raisins

250g rolled oats (I use gluten-free)

30g flax seed (brown linseed)

Dark chocolate, for grating (optional of course)

  1. Preheat the oven to 140 degrees and line your tin with greaseproof paper
  2. Melt the butter and honey in a small pan. Add the banana, apple and 100ml hot water and mix
  3. Mix the oats, dried fruit and seeds in a large bowl and pour in the wet mixture until everything is coated.
  4. Tip into your tin, levelling your surface, and grate over a little dark chocolate (this is completely optional – I’m just a sucker for chocolate) and place in the oven for around 1 hour.
  5. Remove from oven and leave to cool in the tin before cutting into slices. Store in the fridge for best results.


Chocolate, Orange & Caraway Shortbread

Today I wanted something simple and tasty to munch on with a cup of tea (when do I never want this?!) sooo shortbread was a winner for me.

I love the buttery flavour of shortbread and it’s always been a weakness of mine… I literally don’t know when to stop!

So here is a classic go-to recipe – you can play around with the flavours and be creative, for example switching orange with lemon, or adding lavender, vanilla, honey etc etc… just don’t mix too many different flavours together, I usually stick to fruit or chocolate for texture and a complementing flavour such as orange or lemon.

Enjoy – these are simply amazing! 🙂

Chocolate Orange & Caraway Shortbread

200g plain flour

50g caster sugar

125g unsalted butter, softened

zest of 1 orange

30g dark chocolate, finely chopped

1 tsp caraway seeds

  1. Preheat the oven to 170 degrees and line a baking tray with baking paper
  2. Mix the flour and sugar in a bowl and then rub in the butter (using your thumb and forefinger)
  3. Add the zest of orange and roll into a ball shape
  4. Push or ‘stamp’ out your desired shape, directly onto the prepared tray
  5. Press in the chocolate and caraway seeds and sprinkle over caster sugar
  6. Place in the oven for around 20 minutes (or until a light golden brown)