Banana Doughnuts with a Chocolate Glaze

Yes I am back on the doughnut baking hype!

I’m up against a busy few weeks of work, thus on my day off today, what do I think of baking…. but of course, doughnuts!

IMG_0814

IMG_0816

IMG_0817

IMG_0818

IMG_0819

IMG_0821

IMG_0823

Today I wanted simple, plain, good ol’ doughnuts with a nice shiny chocolatey glaze. Obviously I had to include bananas, because, why not?! The addition of buttermilk gives them that all too lovely twang, yet the sweetness of the bananas and brown sugar creates the yummiest of combinations.

IMG_0826

IMG_0827

IMG_0830

IMG_0832

IMG_0842

These are soooooo scrummy we pretty much ate the whole lot in one sitting… we weren’t actually sitting…. we were all standing around the doughnut pan…. there’s nothing quite like a warm doughnut with a chocolate glaze fresh out the oven.

Enjoy ❤

IMG_0837

Banana Doughnuts with a Chocolate Glaze (makes around 8)

125g plain flour

1 tsp baking powder

¼ tsp bicarbonate of soda

¼ tsp ground nutmeg

¼ tsp cinnamon

Pinch of salt

1 egg

65g light brown sugar

60g unsalted butter, melted

2 ripe bananas, mashed

1 tsp vanilla extract

2 tbsp/30ml buttermilk

For the glaze:

100g dark or milk chocolate

1 tbsp rapeseed oil

1 tbsp golden syrup

  1. Preheat the oven to 180 degrees and spray your doughnut pan with non-stick spray
  2. Whisk the flour, baking powder, bicarbonate of soda, cinnamon, salt and nutmeg in a medium bowl
  3. Whisk the egg and sugar together until smooth. Whisk in the melted butter, mashed bananas, vanilla extract and buttermilk, until fully combined
  4. Pour the wet ingredients into the dry and stir until just combined, be careful not to overmix, otherwise the doughnuts will be too dense
  5. Spoon the mixture into your doughnut pan, or use a piping bag (whichever you prefer)
  6. Bake for around 8 minutes or so, until they have browned a little. Remove from the pan and allow to cool slightly before glazing
  7. To make the chocolate glaze: melt the chocolate, oil and golden syrup in a pan over a low heat. Dip the doughnuts into the chocolate glaze and sprinkle over pretty much anything you want (I left mine plain because I was in a plain mood 😉 )
  8. I find that they are best eaten on the same day, but if you don’t quite manage that, you can pop them in the microwave for a few seconds to soften and warm up!

*inspired by sallysbakingaddiction*

My Favourite Banana Bread [with nutella this time]

It was a banana bread kind of day today. I had 4 bananas hanging on my banana tree looking very very bruised and sorry for themselves; now they are very very mashed and happy in my bread!

IMG_0218

IMG_0220
IMG_0231-001

IMG_0232-001

IMG_0234-001

IMG_0251-001

I loooooooooooove this recipe and make it all the time, but today was special, because I dolloped a load of nutella in the middle. You can add pretty much whatever you want (or keep it plain and simple with no “swirl”).

IMG_0239-001

IMG_0245-001

IMG_0249-001

It was too good today, thus I had to share.

Click here for the full recipe and instructions in my previous post….

ENJOY ❤

IMG_0255-001

Raspberry, Almond & White Chocolate Blondies

I probably just had my favourite weekend. My favourite person in the whole entire world came to stay, (sorry Gavin 😉 ) my nephew George. Yes, he was George a few months before Prince George was George!

George is the chattiest, cutest, loveliest, most adorable, well-mannered, hilarious little two year old in the whole wide world. I never thought I could love a little person as much as I love him.

George also came bearing gifts; freshly picked raspberries from Linby (Nottinghamshire). As we are slowly nearing the end of the strawberry and raspberry season here in England, they were ripe and ready to munch on.

11811374_10206186075924169_1943278734327323548_n

11822624_10206186097644712_3516685676931051043_n

11822624_10206186075404156_3817481424936696990_n

Over the past few weeks I’ve made some crackin’ fruit related baking goodies: Strawberry n’ Cream Muffins, Strawberry & White Chocolate Shortbread, Extra Thick Strawberry Buttermilk Pancakes and Jumbo Raspberry Chocolate Muffins.

11822435_10206186074564135_6046880267686721032_n

11781724_10206186075124149_5802478216535881592_n

11222194_10206186074404131_9044316874604944775_n

So I’m thinking, hmmmm, what have I not made in a while….. BROWNIES! Or rather, BLONDIES! I’m a little obsessed with white chocolate at the moment, so these really have tipped me off the edge.

I’ve been in a blondie coma for approximately 3 days now.

11751961_10206186072564085_7892517840716839195_n

11222194_10206186072804091_2233446461110898387_n

Simple to make, with a wonderful cake-y flavour yet moist brownie texture, these are heavenly. The almonds create a lovely crunch and subtle nutty flavour, you can’t really say no.

Enjoy!

11800100_10206186073924119_4258372151595692232_n

Raspberry, Almond & White Chocolate Blondies (makes around 20)

200g self-raising flour

Pinch of salt

200g caster sugar

200g unsalted butter, softened

3 eggs

30g flaked almonds (I crushed them a little)

150g white chocolate chunks

150g raspberries

1 tsp vanilla extract

  1. Preheat the oven to 160 degrees and grease your baking tin
  2. Sift the flour and salt into a small bowl and set aside
  3. Cream the butter and sugar together until light and fluffy
  4. Gradually add one egg at a time along with a spoonful of flour
  5. Add the remaining flour and vanilla extract, until fully combined
  6. Gently fold in the almonds, white chocolate and raspberries – don’t be afraid of the mixture going pink and streaky from the raspberries – this adds to the appearance!
  7. Spoon into your tray and bake in the oven for around minutes
  8. Cool on a wire rack and then remove from tin – ENJOY!

11796372_10206186073164100_7445088145854528216_n

11796195_10206186074004121_2738486838095313893_n

Crazy Sparkly Chocolately Cake Pops

IMG_9429

Every year my best friend and I exchange cakes for our birthdays. Katie’s is the 4th of July, mine the 4th of August. We’ve never done presents and I absolutely love the zero amount of pressure that’s involved in trying to find a new present each year. Although this, of course, translates into trying to find new and different things to bake each year! We started with standard cakes; vanilla, chocolate, coffee, all with various different icings, buttercreams, fillings and decorations. Occasionally branching out to cupcakes and muffins, this year it hit me that I should probably up my game. Not that it’s a competition WHATSOEVER (:P) but since I do write a baking and cooking blog after all, I suppose I should think outside the box a little.

And then came the box.

My Mom has a special box hidden under her bed full of goodies she’s accumulated over the years, which she has never had a chance to give to anyone in particular. It’s great for last minute presents or forgotten birthdays.

Inside this special box, was another box.

I have this weird obsession with cute boxes, which usually get filled with mini goodies and given as presents in themselves (stay with me!). For example, Gavin’s 21st birthday a few years ago called for something different and special. So I went out and bought a big box and filled it with loads of things I knew he’d love; he’s never forgotten it and still uses the box to this day.

So inside Mom’s special present box was a cute little box, just sitting there waiting to be used.

Thought one: let’s use the box.

Thought two: how is this in any way related to cakes and baking?

Thought three: I can’t fit many cakes inside the box

Thought four: let’s make cake pops and stick the cakes on top of the box

Thought five: why do I get myself into these crazy situations and weird ideas?

Thought six: I need to try and not stab myself with these scissors when making holes in the box to stand the cake pops in….

And so the mission began, to make some cake pops, all in a days work right?!

IMG_9416

IMG_9417

For starters I’d never made cake pops before and didn’t have any candy melts in the cupboard. I did a little research and just went for it. After baking vanilla and chocolate sponge cakes, I then destroyed these (scarily satisfying) and created an almost truffle like mixture, with sponge cake crumbs and vanilla frosting.

Using an ice-cream scoop (to make sure all the balls were the same size) I created loads of mini balls and popped them in the fridge for a few hours to harden.

IMG_9420

IMG_9421

Next came the tricky bit; using melted chocolate is not what most people recommend for covering cake pops with, however to help the melted chocolate remain thin and set around the dough ball easily, I added a little rapeseed oil – this did the job perfectly. I was so surprised at how easy it was, once you’ve done the first few and got the hang of it.

IMG_9423

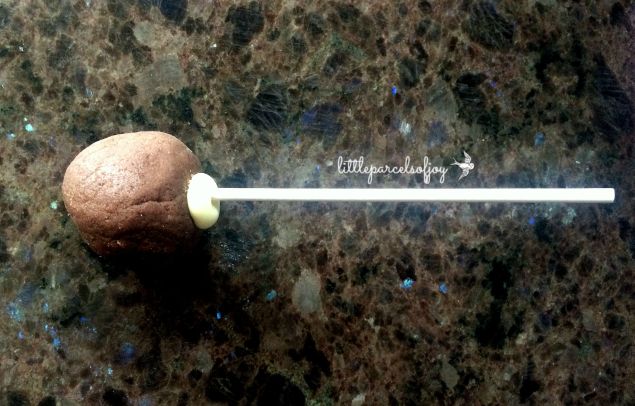
Helpful little tips: 1. dipping your lollipop stick into the melted chocolate or candy melt before pushing through into the dough ball. This acts like a glue and holds the stick in place. 2. Make sure you push the stick far enough into the ball so it is not flimsy and likely to fall out – but don’t make the mistake of pushing it right through the other side! 3. Make sure you have all the equipment you need to hand – it’s very fiddly work – having a stand to put the cake pops on to set once coated is VERY IMPORTANT! I used egg boxes but other suggestions could be a colander, Styrofoam, or a deep bowl full of sugar.

IMG_9424

IMG_9426

Technique?

Dip, swirl, tap.

Everyone will have their own way of doing it and it’s so satisfying once you get into a rhythm. Decoration is a piece of cake (yeah I went there) I love cute sprinkles and glitter.

IMG_9446

IMG_9430

IMG_9462

And there you have it…. Some incredibly yummy cake pops, stood in a pretty box.

Happy Birthday Katie! I can’t wait to see what you have in store for me 😉

IMG_9444

IMG_9433

Cake Pops (vanilla & chocolate sponge with white & dark chocolate coating, makes around 20)

175g unsalted butter, softened,

175g caster sugar

175g self raising flour

2 eggs

1 tsp vanilla extract

(for the chocolate sponge – 40g cocoa powder and a splash of milk)

For the vanilla frosting:

225g icing sugar

75g unsalted butter, softened

25ml milk

½ tsp vanilla extract

For the candy coating:

Packet of candy melts or cheap everyday chocolate and around 1 tbsp oil

  1. To make the sponge cakes: Preheat the oven to 180 degrees. Lightly grease your cake tins and place to one side
  2. Cream the butter and sugar together until pale and fluffy. Add the vanilla extract
  3. Add one egg at a time, with a spoonful of flour, beating thoroughly after each addition. Add the remaining flour and mix until completely combined
  4. Split the mixture in half and add the cocoa powder and splash of milk to one half, making the chocolate sponge
  5. Pour the mixtures into your prepared tins and bake for around 20-25 minutes
  6. Remove and allow to cool on a wire rack
  7. To make the frosting: Beat the icing sugar and butter together until completely combined. Add the milk and vanilla slowly and continue to beat until the frosting is light and fluffy
  8. To make the dough balls: Now the cakes have cooled, using your hands, crumble the cakes (keeping the sponges separate at all times) until they resemble fine crumbs. Split the frosting in half and mix with the two sponges until completely combined and you now have a soft dough like consistency
  9. Create your desired sized balls (not too big!) and place on a baking tray in the fridge to cool and harden for around 1-2 hours
  10. To coat the dough balls: Melt your chocolate and mix in a few splashes of oil to thin the mixture (if you have candy melts follow the instructions on the packet). Using a deep glass or jar, place your melted coating in this and get ready to create your masterpieces!
  11. Dip your lollipop sticks into your coating (to act like a glue) and slowly place into your dough balls (about ¾ of the way through). Now dip and swirl your dough balls in the melted coating, ensuring that they are fully coated. Tap gently until all excess coating drips off
  12. Decorate as desired and place to completely set – for around 30 minutes just to be safe!

IMG_9451

IMG_9448

IMG_9452

IMG_9458

Strawberry & White Chocolate Shortbread

Now the last time I made shortbread I baked my Chocolate, Orange & Caraway Shortbread. They were so moreish and disappeared pretty fast. I found that they had a biscuit/cookie texture, which actually worked out extremely well.

However today I want to try a different method (creaming the butter and sugar together and then adding the flour – rather than rubbing the butter into the flour and sugar). I also want these to be a little more dense and creamy, thus I’m adding more butter and sugar this time, as well as some cornflour to thicken up the dough.

11696006_10206098977026751_3821646065566389315_n

11704816_10206098978106778_6092189573480486724_n

Of course we all know it’s the strawberry season (if you have somehow managed to miss this, check out my yummy Strawberry n’ Cream Muffins – they are insane!), and so I must include some delicious fresh strawberries. Dried fruit would definitely be easier to work with in this sort of recipe, however I like a challenge and love the pinky streaks the fruit creates in these shortbreads (I’m one of those weirdos who likes imperfection)

11742718_10206098978026776_297372745707761941_n

11695006_10206098977346759_7314616047421203636_n

Just a word of warning: because fresh fruit has a lot of moisture, you may need to add a little more flour to this dough when ‘knocking up’ and rolling, but don’t be afraid of a moist dough, it just means your hands will get extra messy and sticky, but your shortbread will be extra creamy and juicy when you hit a strawberry crunch!

11760092_10206098975426711_8117583188932017438_n

11695924_10206098976066727_5307135754713833167_n

1514989_10206098974826696_6557398724620121463_n

11264867_10206098975706718_6567473453404657080_n

As we all know my recipe cannot go without a little chocolate; today I’m in the mood for a creamy white chocolate chip, to complement the texture and flavour we’re going for today.

11059422_10206098974346684_1241862896453693906_n11705332_10206098974546689_2244622553494474544_n

After walking round my garden and picking some fresh lavender I had a little thought of using lavender flavouring in my next batch. I really really like crisp and light flowery tastes in biscuits.

11698886_10206098972786645_8084494548180433240_n
11705199_10206098971586615_8737539223782075339_n

 These are a big hit and are great for nibbling on a warm sunny day with a cup of Yorkshire tea (what else?!)

11745832_10206098973426661_3600518678863402012_n

11750638_10206098971506613_7856107303811951510_n

11752049_10206098970986600_1938328086063330340_n

Enjoy ❤

Strawberry & White Chocolate Shortbread (makes around 40)

200g unsalted butter, softened

100g caster sugar, plus extra for dusting

200g plain flour, plus extra for dusting

100g cornflour

Pinch of salt

75g white chocolate chips

75g finely chopped strawberries (dried fruit would work best however I used fresh – just prepare for the colour to run a little)

  1. Lightly grease and line your baking trays
  2. Cream together the butter and sugar together until light and fluffy
  3. Sift the flour and cornflour into the bowl and then add the salt. Mix together until smooth and combined
  4. Add the strawberries and chocolate then gently fold
  5. Tip onto a lightly floured surface and knead to form a soft dough
  6. Roll out between 2 pieces of baking parchment to around 1cm thick. Prick the dough and cut into whatever shapes you desire
  7. Place the shortbreads onto your trays and chill for around 45-60 minutes.
  8. Preheat your oven to 170 degrees and bake shortbreads for around 15-20 minutes, until just golden brown. Leave on the trays for a few minutes to cool and then place on wire rack to cool completely.
  9. Dust with sugar and hey presto you’re in! These keep for around 5 days…. Enjoy!

10426589_10206098973706668_8565904563441118385_n
11143443_10206098972906648_3360721929473748634_n

The King of the Cookies

*ALERT* 

I have discovered THE BEST COOKIE RECIPE EVER!

I won’t try and pretend that I made this recipe up. Like with everything, you take inspiration from various people and their recipes – today it was from one of my favourite food bloggers Sally’s Baking Addiction.

I love how Sally explains each and every ingredient and the reason why she has decided to include it. I’ll give you the lazy overview of what Sally says:

  1. Underbaked cookies are the secret to softness (that’s pretty general knowledge)
  2. Using more brown sugar than white sugar results in a moister, softer cookie (something I’ve only recently discovered, and couldn’t believe I’d never realised… I’ve never looked back!) 
  3. Adding an extra egg yolk increases chewiness (new to me – she’s definitely right)
  4. Rolling the cookie dough balls to be taller than wider increases thickness (yep got that one – that’s more preference that anything)
  5. Using melted butter (and slightly more flour) increases chewiness (to be honest I always melt my butter anyway – I never realised I was on to something amazing) 
  6. Chilling the dough results in a thicker cookie (every cookie monster knows this one!)

BUT the most important point I discovered was using a thickener. Sally uses Cornstarch, I used Arrowroot.

This is my secret ingredient (not so secret anymore). I can’t emphasise enough how this completely transformed my cookies!

Everyone agrees that these are very ‘cookie’ cookies. In other words: they are just like bakery style cookies you buy from a supermarket, cafe or bakery.

They are SOOOOOOOOO soft and SOOOOOOOO chewy and SOOOOOOO thick and just SOOOOOOOOO tasty – just like a cookie should be.

I’m seriously excited about these, can you tell?

So along with my Brownies, this recipe has made it in to my royal hall of all time classics and favourites.

GO BAKE THESE!

p.s. obviously you can add whatever you fancy, I threw in some m&ms, smarties and dark chocolate chunks…. go wild 🙂

 Classic Cookie Mix (makes around 24)

280g plain flour

1 tsp bicarbonate of soda

1 1/2 tsp arrowroot

1/2 tsp salt

170g unsalted butter, melted

135g light brown sugar

100g granulated sugar

1 egg & 1 egg yolk

2 tsp vanilla extract

200g chocolate chunks or your preferred extras

  1. Stir together the flour, bicarbonate of soda, arrowroot and salt in a large bowl
  2. In a medium size bowl, whisk the melted butter, brown sugar, and white sugar together until no brown sugar lumps remain
  3. Whisk in the egg, then the egg yolk. Finally, whisk in the vanilla
  4. Pour the wet ingredients into the dry ingredients and mix together. Fold in the chocolate chips
  5. Cover the dough and chill in the refrigerator for around 3 hours
  6. Take the dough out of the refrigerator and allow to slightly soften at room temperature for 10 minutes
  7. Preheat the oven to 160 degrees and grease your baking trays
  8. Roll the dough into balls, make them taller rather than wide, to ensure the cookies will bake up to be thick. Press a few more chocolate chips/chunks on top of the dough balls for great appearance
  9. Bake for around 10 minutes, even if they look soft, they will carry on baking on the tray once removed
  10. Allow to cool on the tray before removing and placing on a wire rack to cool completely

img_8475

img_8477

img_8483

img_8485

img_8540

img_8542

img_8544

img_8545

img_8549

Millionaire’s Caramel Krispie Square Madness!

IT’S FRIDAY!

Friday and the weekend in sight calls for one thing, and one thing only…. special baking treats and celebration!

This weekend was a traybake of course. I do love my traybakes (Malteser Buns, Oreo Truffle Brownies & Mini Egg Rocky Roads) and it would be hard to choose which would make my number 1 hot spot, but I think these Millionaire Caramel Krispie Squares have come very very close to it.

Although traybakes take a little time, making the various layers separately and doing sometimes fiddly bits and bobs, they pay off BIG TIME! They last for ages (I usually chill them) and are so yummy to nibble on for an energy boost. They are great to share around with guests – I’ve made these for my Grandad who has been in and out of hospital this week – they are perfect to throw in a little box and take with you anywhere.

I love Millionaire Caramel Shortbread, however since I recently made a big batch of shortbread, I wanted something different…. boy was I glad when I switched to rice krispies!

You can use up your old cereal lying at the back of the cupboard (great!) and create something so mouth watering-ly delicious.

I also kinda like how you can have breaks after each section is finished and sit back whilst they are cooling in the fridge – it breaks up the baking process, rather than an intense hour or two of solid baking. Also, no oven is involved – bonus- no constant checking and worrying about temperatures!

These are seriously amazing – I made them yesterday and let me tell you, there are not that many left!

Enjoy your weekends all 🙂

Millionaire’s Caramel Krispie Squares

For the base:

30g butter

150g marshmallows

90g rice krispies

For the caramel:

397g condensed milk

100g dark brown sugar

80g butter

2 tbsp golden syrup (I used Butterscotch syrup – just to spice it up a bit!)

Pinch of salt

For the topping:

150g chocolate of your choice (I used milk)

Squirt of golden syrup

  1. To make the base: Grease and line your baking tin with grease proof paper
  2. Melt the butter and marshmallows in a pan, stirring frequently until everything has melted (this may take a little patience)
  3. Add the rice krispies and mix until thoroughly coated. Working quickly, tip the mixture into the baking tin and press it firmly down so that it is level (I used a sheet of grease proof paper – it does get rather sticky but keep with it!) Set aside to cool for around 30 minutes
  4. To make the caramel:Put all of the caramel ingredients into a pan set over a medium heat. Stir frequently until the sugar has dissolved
  5. No turn up the heat slightly and boil gently stirring frequently. To test whether it is ready, you can drop a small amount of the caramel into some chilled water – it should form a firm ball that does not flatten when removed, but squishes when squeezed. It will also take on a much darker, ticker consistency
  6. Take the pan off the heat and place the bottom of it into cold water to stop the cooking process. Set aside and allow to cool for 10 minutes
  7. Stir well, then pour over the cooled base. Place in the fridge for around 2 hours until set.

Finally, melt the chocolate and spread over the caramel layer. Again, place in the fridge for at least 2 hours, allowing it to set before removing and cutting into your squares (I actually left it over nightbefore cutting – I also used a warm knife to help prevent the chocolate layer cracking)          DSCF2687 DSCF2689 DSCF2690 DSCF2701 IMG_8154 IMG_8164 IMG_8166

It’s a Chocolate Fudge Cake Kinda Day…

Gavin is staying this week so his choice of cake to munch on (I persuaded him not to make me bake yet another Cappuccino Cake – his favourite) was to be the all-time-classic Chocolate Fudge Cake. We used dark chocolate rather than milk (lactose-free) and although it gave it a rich taste, I must say this cake is delicious.

It is so so simple to make – and who doesn’t love a layered cake spread with yummy icing?!

Perfect with a cup of tea or coffee…

ENJOY!

Chocolate Fudge Cake (serves 8)

150g milk chocolate (I used dark i.e. milk-free and this turned out lovely – just a little rich)

3 tbsp milk (I use soya)

150g butter (soya again – with a sunflower base)

150g light muscovado sugar

3 eggs

200g self raising flour (gluten free)

1 tbsp cocoa powder

1 tbsp golden syrup

50g fudge pieces

For the icing:

300g dark chocolate

150g butter

100g icing sugar

1 tbsp cocoa powder

  1. Preheat the oven to 180 degrees and line/grease your sandwich cake tins
  2. Melt the chocolate with the milk over a low heat and then set aside
  3. Cream the butter and sugar and then add one egg at a time, beating well after each
  4. Stir in the melted chocolate and mix thoroughly
  5. Sift the flour and cocoa powder over the mixture and fold in with a metal spoon
  6. Finally add the golden syrup and fudge pieces
  7. Divide the mixture between your tins and bake for around 30 minutes
  8. Turn out onto wire racks and allow to cool completely before icing
  9. To make the icing, melt the chocolate and butter. Sift the icing sugar and cocoa powder in a separate bowl and gradually add the melted mixture. Add a drop of milk if needed
  10. Spread the icing thinly over each layer and finally use generously over the top and sides. Decorate with strawberries, chocolate sprinkles and dust with icing


Big Friendly Classic Choc Chip Muffins

Using the same recipe as the Jumbo Raspberry Chocolate Muffins I have switched the fruit and dark chocolate – with nuts and milk/white chocolate – creating a lighter muffin, rather than the rich and tangy raspberry and dark combination.

The nutmeg and cinnamon in these really bring out the flavour of a bakery style muffin – you know the type you get in Starbucks or Costa, or funnily enough, a bakery! With a donut type hint these are so easy to munch on and taste amazing after a 10 second blast in the microwave a few days after they are made.

You won’t need anything else to eat after these… seriously…. they are not ‘skinny’ muffins!

Classic Jumbo Choc Chip Muffins (makes 6)

375g plain flour (I use gluten-free)

4 tsp baking powder

Pinch of sea salt

1 tsp ground cinnamon

1/2 tsp ground nutmeg

2 eggs

200g caster sugar

240ml milk (I use soya)

120ml vegetable oil

1 tsp vanilla extract

150g milk chocolate chips

100g white chocolate chips

Flaked almonds to sprinkle on top

  1. Preheat the oven to 220 degrees and spray your muffin pan with non-stick spray
  2. Mix together the flour, baking powder, salt, cinnamon and nutmeg
  3. In a separate bowl, whisk together the eggs and sugar. Add the milk, oil and vanilla extract
  4. Fold the wet ingredients into the dry and mix together with a wooden spoon (make sure not to over mix as this with produce dense muffins!)
  5. Fold in the chocolate chips (leaving some aside for the top)
  6. Spoon into the pan (fill right to the top!) and sprinkle over your almonds and the remaining chocolate chips.
  7. Place in the oven and bake at 220 degrees for 5 minutes and then reduce the temperature to around 180 degrees and bake for a further 25 minutes
  8. Leave to cool before removing – I love to heat these up for a few seconds after a few days, they are so tasty!

IMG_7732-1

IMG_7733-1

IMG_7734-1

IMG_7740-1

IMG_7737-1

IMG_7741-1

IMG_7738-1

IMG_7750-1

IMG_7742-1

IMG_7754-0

IMG_7755-0

Mars Bar, Fudge & Choc Chip Cookies 

Today I cleaned my house, (I’m one of those horrible people who compulsively clean and really really enjoy it – it’s therapy for me), visited my Auntie’s house where I gave her cat Brucey some TLC (this morning and evening), had a telephone interview for a potential job, prepared a pork tenderloin and mushroom sauce and baked some cookies. I feel like I haven’t sat down all day and the soles of my feet have that knawing tooth ache pain because I actually haven’t stopped.

So if you’ve had this kind of day, or will have one similar tomorrow, seriously – bake these cookies…. Or ideally, get someone else to bake them. They have a lot of sugar and chocolate in them and they make me feel good when I eat them (Please have with cup of tea).

You can replace the chocolate bars used for any of your favourites – I just particularly like Mars Bars.

I love baking cookies!

Mars Bar, Fudge & Choc Chip Cookies (makes around 30)

250g unsalted butter

300g light brown sugar

150g caster sugar

1 tsp vanilla extract

2 eggs

310g plain flour

1 tsp bicarbonate of soda

Pinch of sea salt

3 mars bars

3 chocolate fudge bars

100g dark chocoalte chunks

Cinnamon sugar for sprinkling

  1. Cream together the butter and sugars until light and fluffy
  2. In a separate bowl, whisk together the eggs and vanilla
  3. Sift together the flour, bicarbonate of soda and salt in a bowl
  4. Add a spoonful at a time of wet and dry ingredients to the creamed butter, beating until just incorporated
  5. Mix in the Mars Bar chunks, fudge chunks and chocolate chunks
  6. Wrap the dough in clingfilm and refrigerate for around an hour
  7. Preheat the oven to 180 degrees and grease your baking trays
  8. Using a cookie scoop or just your hands, place the cookie balls onto the trays
  9. Bake for 12 minutes and leave to cool before eating


Brucey the tabby I’m looking after for the week – he’s a cutie ❤